Sliding Door
by Richard Atwell
(c) Copyright 2004-2011
Sliding Doorby Richard Atwell |
|
Don't believe those lying commercials: long before Chrysler even imagined a minivan VW had introduced our sliding door back in 1967. The door first appeared as an m-code option with for the 1967 splitwindow bus and was standard on the baywindow bus.
Keeping your sliding door working perfectly requires an understanding of how it works. When it's properly adjusted is will sound like this:
Oh that sounds Shweet! It will also close with a light touch instead of a wind up slam.
The door mechanism is pretty robust but some parts wear over the years. Notably, the nylon runner on the sliding track and who hasn't seen a broken inside door handle? When adjusted properly and greased, it should work for years without problem.
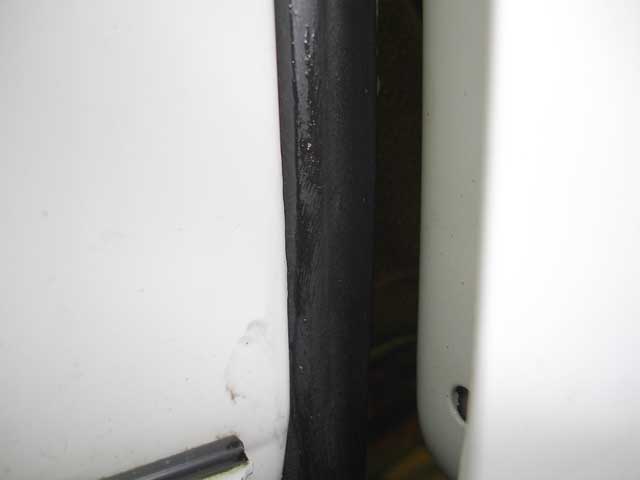
You do not have to cut and glue a new sliding door seal in order to install it. All you have to do is remove the hinge mechanism, slip the seal over it and put it back. You can do this all without removing the track cover but I've taken the cover off to show the cutout that VW left midway down the track.

|
You cannot remove the hinge from the rear of the track because the cover is in the way. Even if you remove the cover, the door will hit the stops on the body before letting you remove the hinge mechanism. 1. Slide the hinge towards the middle and looking up from below the track align it with the cutout and prepare to lift it out. |
|
|
|
|
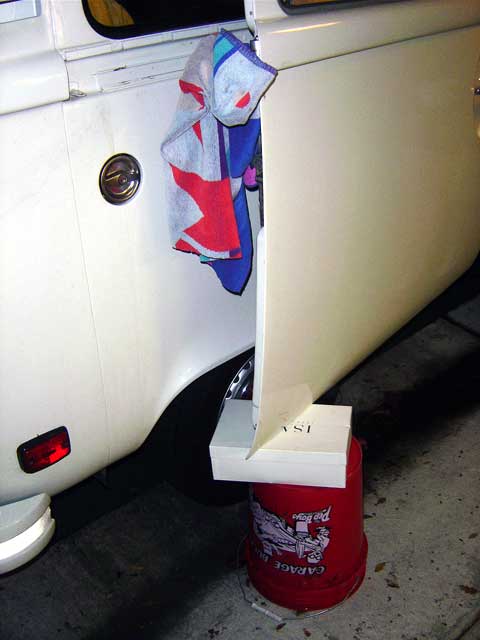
2. Since the hinge is the only thing holding the door up at the rear, find whatever support that you can to rest the heavy door on before you try to release the hinge. You can see that I had to hunt around the garage to find a combination of items that would work for me. With the door on the rest, lift out the hinge at the cutout by the nylon piece then you can remove the roller and completely disengage it from the siding track. Swing the door out about 45 degrees and let it rest on the support you've provided. You can now fit the seal over the door and perform the removal steps in reverse. |
|
|
|

|
The seal only fits correctly one way but it can be confusing just looking at it in your hands. On the right side of the door opening, the block part of the seal is inside and the lip is on the outside to catch the edge of the door. On top, the lip runs against the edge and the floppy part of the seal below rests against the door. It's a mirror image on the left side and bottom with the seal on the left getting crushed by the closing action of the rear of the door. |
The sliding door is a sheer marvel of engineering but how the heck do you take it off?

|
1. Follow the steps above for removing the hinge. To remove the door you will need a second person to help you lift it. First, slide the door all the way back until it hits the rubber stops. Then, swing open the door 45 degrees. |
|
|
|

|
2. This will rotate the rollers at the base and align them with the cutout in the lower track. To release the door, first lift it out the from the bottom so the rollers clear the bottom track. |
|
|
|
|
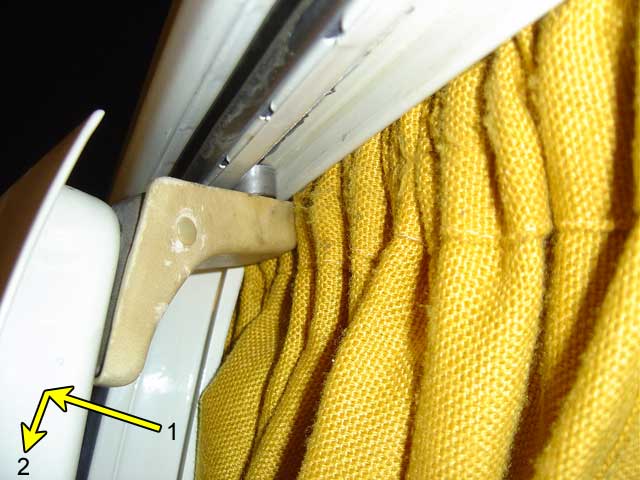
3. Then drop the door slightly so the top roller drops out of the top track. See the arrow I've drawn? The door has to be oriented this way before you can remove it. |
|
|
|

|
At this point the door is free and you can rest it someplace. The door is quite heavy. You could lift it yourself but the reach from top to bottom is so great you'll have a difficult time removing it. Do yourself a favor and have a helper standing by to make the job an easy one. |
Re-greasing the track can be done without removing anything but if your bus has been around the block it may contain hardened grease, dirt, rust, etc. For the first service, I recommend completely removing the door to service the track and the hardware components to ensure smooth operation. If the door is already working well, you can probably get away with just adding some more grease.

|
1. The track is held into position by clips that are part of the body. What makes removal difficult is the fact that the plastic beading really wedges the track into place and the track can accidentally bend being made from thin sheet metal. To remove the track first undo the two screws below the track at each end. For many, there is an even more immediate challenge because the phillips sheet metal screws have been painted or they are simply rusted on tight. If it is rusted try an impact driver along with some penetrating fluid to release it. If there's paint, remove the paint from the phillips head recess before you strip the head. |
|
|
|

|
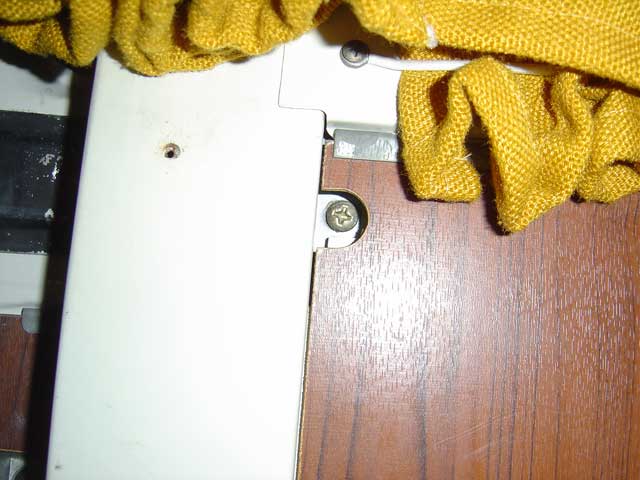
2. A second screw secures the track to the retainer. This screw is easy to remove but the track cover wraps around the sliding mechanism so you have to remove the track from the rear and massage it out of position at the front. |
|
|
|
|
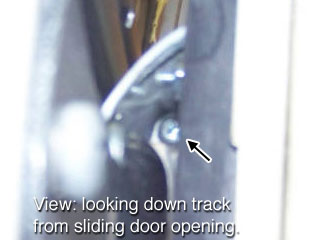
Note: if you have a 68-72 model, there is a hidden screw (as seen from the inside looking down the track) that needs to be removed from the clamping strip. Otherwise it will prevent you from removing the plastic beading (welt). See parts #15 and #19 in the fiche: Sliding Door Track microfiche. |
|
|
|

|
3. After removing the screws, use a block of wood and a rubber mallet to safely whack it from the inside. When it comes free you may experience an all mighty cracking noise as the plastic beading comes free. Remember that the front tab curves around the retainer, so release the track as evenly as possible from the rear. |

|
Once the track is removed all that should be left is the retainer that locks the door in the open position. Mine still has some overspray on it from the shortcut the painters took. |
|
|
|
|
The retainer doesn't need to be removed unless the spring is broken or the rubber has worn out. Mine looks pretty good and I suspect they are pretty durable. If you wish to remove it, before taking off the two bolts on the front, there is a secret screw that first has to be undone from the inside of the body. |
|
|
|

|
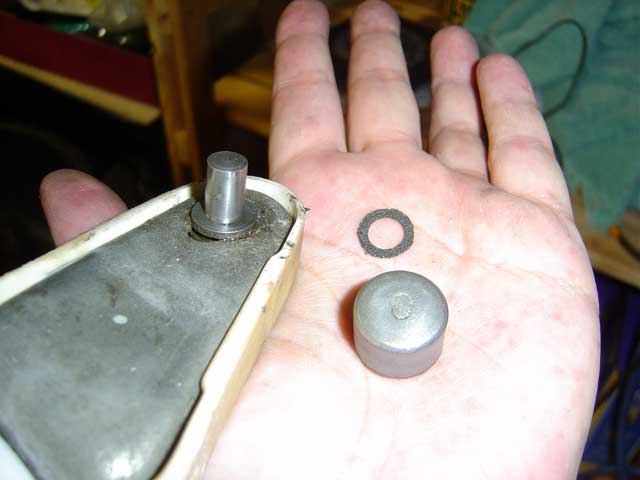
I'm sure VW put this rubber washer in place for a reason so be careful not to lose it. |
|
|
|
|
The top roller is easy to R&R. It simply pops off the top so you can clean it out and re-grease the post with a moly based grease. Note the felt washer that helps to keep the grease from escaping. Notice the "O" on the roller. This identifies it as the top roller which is also smaller than the bottom one. |
|
|
|

|
The bottom roller is a little more complicated. It consists of a similar roller with a "U" marking and again a felt washer to keep the grease in. The second roller in the photo has a sealed bearing that supports the weight of the door. You should not have to remove the sealed bearing but if you find you can't clean behind or it doesn't roll smoothly it you will have to remove the black cap and remove the circlip to remove it. Be careful your retaining ring pliers do not damage the seal cover for the bearing under the black cap. If you wish to remove the bottom bracket for whatever reason, use masking tape to record the position of the bracket. Notice the shims? They are sandwiched between the bracket and the sliding door above it. If you wish to have the door close correctly this bracket much be positioned just as the factory aligned it. Avoid removing this bracket unless you are forced to (bent/broken/etc). If the shims are missing because the door has been transplanted from another bus, you might find that you are unable to align the door properly with the rear latch. In this case you will have to shim the door to match the body just as the factory did. |
|
|
|

|
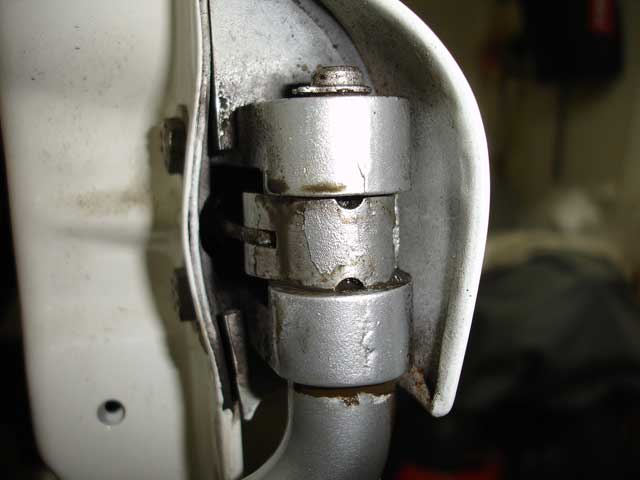
The hinge mechanism is made of 3 sections: the sliding portion, the u-bend and the spring attached to the door. The hinge has several locking levers which may need cleaning but the main concern is the bearing and the nylon runner. |
|
|
|

|
The bearing comes off after removing the nut and washer holding it down. If the shaft is rusted to the bearing use a tiny battery terminal puller to release it. Like the lower bearing, this one is also sealed and either rotates smoothly or is shot. Although you could service the bearing, you will probably be better off buying a new one although it's relatively expensive for its diminutive size the last time I checked. Again, be careful with the sealing caps when using retaining ring pliers during disassembly. |
|
|
|

|
The other item of maintenance is the nylon guide. This wears out from rubbing directly on the body. The later style from 76 1/2 onward is riveted onto the mechanism. You'll have to drill out the rivet from this side and replace it with a screw and locknut. |
|
|
|

|
The replacement nylon pieces come with fasteners unless you acquire one from the dealer in which case the part number gets you the nylon piece only. |
|
|
|

|
I can't locate an item as small as the rivet in the fiche but since the locknut clears the track cover on all 68-79 models there are no worries. Rivets are a nuisance anyway. Tip: if you've ever needed to remove the front turn signal housing on a 73-79 bus do not put the rivets back because with fasteners you can get to areas behind the dash easily from the outside of the bus. |
Bentley has instructions to help you adjust the door but of the prior two times I've adjusted the door the first went well, the second did not. This stumped me for while wondering why the door wasn't opening smoothly. When properly adjusted, all you should have to do it push down on the sliding door handle and the door will slide open by itself due to the spring action of the door mechanism.
There are two actions: opening and closing and each have their own problems. Closing problems can be attributed to alignment issues. Opening problems are more related to lubrication as it assumes that the door was aligned properly to allow it to close.
So let's lubricate the door properly.

|
1. The sliding track needs to be greased wherever the nylon rides. Use any kind of grease you want but remember some may wash out when it rains. Since I have a white body I use a heavy white lithium grease. Any other color will look terrible. |
|
|
|

|
2. Grease the upper track above the door opening. Be careful not to get grease on your camper curtains. The door rattles a little in it's guide so grease all 3 sides that the roller will contact. |
|
|
|

|
3. Grease the lower track above the door opening on the bottom where the bearing contacts and the back where the roller contacts. This area can be notoriously dirty so I'd advise you to degrease and clean all of the dirt because re-greasing. |
|
|
|
|
4. The hinge must be oiled (I use engine oil) where you see the two orifices in the side. Work the hinge as you oil it and when it's saturated, clean up the excess so it doesn't drip. |
|
|
|

|
5. All door strikers including the one for the sliding door should be lubricated with a lithium stick. This is much thicker than grease and will wear longer. |
|
|
|
|
6. One source of a sticky door is caused by the door sticking to the seal. You can eliminate this problem by coating the seal with a silicone preservative. I used BMW's Gummi- Pflege (82 14 9 407 015). Würth also makes a similar product. |
|
|
|

|
7. The #1 reason the sliding door won't open on it's own comes from the most unlikely place. Remove the veneer panel to explose the lock... |
|
|
|

|
You must lubricate the two moving plates (shown by arrows) that contact the 3rd fixed plate. Spray some white lithium grease in there and voilà no more wrenching down on the outside handle and reaching over to the hinge to help it. |
Bentley's instructions for adjusting the door are comprehensive enough. What's not mentioned is that you really have to get close to the parts that make contact and eyeball them as you try to close the door to see if they are aligned properly.

|
A tricky one is watching the latch of the central lock hit the striker plate without the "beak" hitting the pin first. Bentley shows how to adjust the striker plate. |

|
Prevent a broken sliding door inner handle and always close the door using the rear locking plate. The sliding door takes a bit of effort to close which makes it difficult to close from the inside. |
10/22/04 - Created
12/19/08 - Added lubrication photos
09/07/11 - Fixed broken photos, added translate button, updated footer
07/15/19 - Google update: new adsense code, removed defunt translate button