70A Alternators
by Richard Atwell
(c) Copyright 2005-2011
70A Alternatorsby Richard Atwell |
|
Most every baywindow bus equipped with an alternator came with a 55A (770W) model from Bosch but if you had a camper or bus equipped with fresh air fans and a BA6 Eberspacher gas heater, the factory put in a 70A (980W) model. If your m-plate has code M618 or a code that expands to include M618, that means you originally had the 70A version.
You might wonder why a gas heater needs a bigger alternator (it's because of the additional power load from the blower for the BA6).
Apart from the higher 15A peak output capacity, the alternator is physically different from the 55A version:
In addition, every internal mechanic part is markedly different from the 55A version.


|


|
The pulley thrust washer is 14mm ID and 2mm thick. The pulley nut is M14 (22mm WAF). The keyed shaft on the later units requires a M16 nut (24mm WAF).
|
|
Exact prices vary from vendor to vendor but in general expect to pay almost $100 more (70%) for an extra 15A (25%) capacity. Considering that an alternator can't run all day long at 100% duty cycle (80% is more reasonable) you should factor your current load requirements with that in mind.


The labels are decoded like so:
K1 - 14V 55A 22

N1 - 14V 70A 20
Bus Depot, Bus Boys, CIP1, any IMC vendor carries this unit (IMC's wholesale price is about $125 but they often want $65-75 for the core). It's usually rebuilt by PPR instead of Bosch. PPR tells me that the core price on this unit is so high because parts are becoming extremely hard to find. They don't expect to be rebuilding this unit in future (maybe several years, maybe sooner) because of the parts situation. I've tried to source new parts from Bosch and all the part numbers come up NLA.
The main reason for this is that the 70A version was optional for 74-79 baywindows. The BA6 was first available in 1974 so that's when VW started to install them. It was also used on the 1976 912E but because only 2099 of those cars were made, it didn't help our cause. If you find a low mileage 912E at the junkyard, grab the alternator and part out the wiring harness.
The best price I've seen on a rebuilt unit is $129 from PFI and there is no core fee to pay! I'm unable to provide any feedback on the quality until I see a unit myself but I thought I'd mention it.
The differences present a problem to the bus owner wishing to swap:
All of those issues can be solved by acquiring parts from another bus. Switching to the 55A version requires overcoming similar obstacles:
This alternator body style is unique to the Type 4 engine. Although the mount is similar to other VW models of the era (mainly watercooled) the fact that the engine is air cooled and requires a cooling port makes them unique. I've also noticed that the casing it held together by 3 bolts instead of 4 which makes it difficult to build a frankenstein alternator (I'd conceived at one time of adapting a self-regulated 90A Bosch alternator to the bus but so far my research hasn't identified a suitable donor).
Bosch hasn't manufactured new versions of these two alternators in years. Bosch tells me that the 70A version was discontinued back on 9/23/99 when the slip ring end-frame became unavailable from the supplier. Parts I believe are still available:
Unavailable (in USA):
Bosch and several other companies remanufacture these units as well as local rebuilders in your city. Typically if it's done by a third party, the vendor will state that the alternator has been remanufactured. If it's been done by Bosch, they will say rebuilt or Bosch rebuilt. Be sure to ask because Bosch offers a strong warranty.

A local rebuilder typically does the following:
A good one would also powder coat your pulley and protect your rotor and stator with an insulating varnish. If your alternator is internally regulated they will test that also but often won't accept an external regulator for testing.
How long should your alternator last? Based on measurements to the slip rings and brushes, you should be able to get 200k miles out of your factory unit unless you have an electrical failure first. The life of your rebuild will depend on whether or not they replaced the slip rings. A good rebuild will tend to last 100k miles and a bad one 5k miles!
Unfortunately repairing alternators and starters is a business of margins which means they often pay immigrant laborers to fix them as quickly as possible. These alternators will not last as long as the original because of the parts they use but you'll get decent mileage out of them.
Of the three rebuilders in town I was quoted, $72, $98 and $125 for varying levels of service. One company promised not to use Chinese bearings. Another said they would replace bearings for $40 if that's all that was required.
What's not forgivable is that they often fail to properly test the diode pack. Most repair shops have an oscilloscope and while they will spin the alternator "wide open" (unregulated) they fail to test the D+ output which tells the voltage regulator what to do. As a result, you can end up receiving a rebuilt alternator that still exhibits charging problems. Be sure to ask them to test the D+ output.
If all you need are new brushes or a bearing a local rebuilder is often the best choice (why trade in a good core if you don't need to) however, the mass rebuilders tend to be more thorough and have better testing facilities in addition to providing better warranties. I asked PPR how they rebuild their units:
"Rebuilt units are demagnetized, cleaned, inspected, lubricated, and seals reinstalled. The bearings are often tested on a machine that checks for noise and vibration levels. Bearings deemed acceptable individually tested and the installed and run on an alternator endurance test machine. New bearings are used to compensate for the loss of unacceptable bearings".
Reputable companies will always replace bearings in an air-cooled alternator because of the heat they are subjected to. Unfortunately even Bosch uses Chinese bearings which is a pity because the bearing quality is still not as good as other countries.
R&R takes between 2-3 hours. The tools you need are:
| 1) Disconnect the battery at the negative terminal. NEVER under any circumstances remove the alternator while the battery is connected in order to prevent damage to the voltage regulator. Never disconnect the alternator while the engine is running to prevent damage to the alternator. 13mm wrench. |

|
| 2) Remove the adjustment cover plate. Quite often this piece of plastic is missing. You can obtain a new one from Bus Depot or the VW dealer (021-119-295). |

|
| 3) Remove the grill covering the fan and timing scale. This is so you can remove the alternator belt. You should inspect the belt for wear while it's removed. 10mm socket. |

|
| 4) Remove the air deflector tin below the passenger side heater box. I'm not a fan of struggling with access to parts when I can simply remove the obstruction with a few screws. #3 Phillips screwdriver. |

|
| 5) Remove cooling boot clamp. The other end of the boot is secured to the fan shroud by a large circlip. Check your boot for cracks but do not remove the boot to do so. Quite often removal will introduce cracks in the rubber where there are none because the rubber has become so hard from age. #3 Phillips screwdriver. |

|
| 6) Remove hot air tube. To ease access of the tinware screws remove this tube and get it out of the way. FI models use a pastic tube while carb models use corrugated paper hose. #3 Phillips screwdriver. |

|
| 7.1) Remove the alternator tin bolt. This is the only bolt holding the tin on; the rest are screws. You cannot pull off the tin until later. Some tins have a rubber boot sealing the dipstick to the tin, later models use silicone sealer. 10mm socket. |
|
| 7.2) Remove the alternator tin screws. Five screws hold the tin on. Remove the top four and... #3 Phillips screwdriver. |

|
| ...don't forget the screw underneath, then... |

|
| 7.3) Pull back the engine seal. |

|
| 8) Remove the center piece of tin. #3 Phillips screwdriver. |

|
| 9.1) Remove the oil filler spout. Corbin clamp pliers are required here. If you don't have any you can use a pair of vice grip pliers but be careful because that corbin ring is really strong. Now you can remove the corner piece of engine tin. |

|
| 9.2) Cover the oil filler tube. The last thing you want is a fastener falling into the engine. |

|
| 10) Remove the adjustment nut. The nut is easy to remove but the t-slot nut behind it is obscured and may fall into a cranny of the the exhaust system if you drop it during removal. 6mm hex bit. |

|
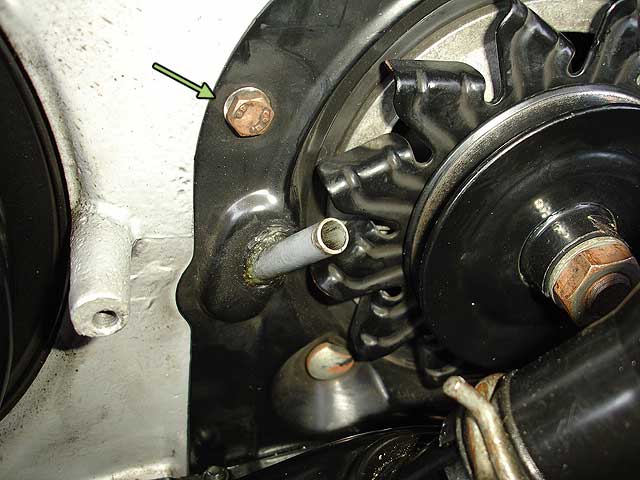
| 11) Remove the nut from the lower mounting bolt. This is when you'll be glad you removed the air deflector tin. Don't remove the bolt just yet, only the nut. 13mm socket. |

|
| 12.1) Remove the alternator adjustment bracket. The photo shows the 75-68 style. The 72-74/79 style is bolted to the heat exchanger. 13mm socket and wrench. |

|
| 12.2) Unbolt the bracket from the fan shroud. This is tricky to do without any socket extensions when the engine is installed in the bus. 13mm socket with extension. |

|
| Here's another shot of the socket from another angle. You can just make out the socket and extension. |

|
| 13) Remove lower mounting bolt. This is a special bolt with "D" shaped head so it can tightened by the nut only. Pull out the bolt while supporting the bottom of the alternator to help unthread the bolt. Let the alternator rest on the engine support bar. |

|
| 14) Remove alternator tin. With the D-bolt removed the final piece of tin can be removed. |

|
| 15) Unplug the alternator harness. Turn the alternator to the right to remove the two plugs from the back. The VR connector is held on with a metal clip and the battery cable is covered by a rubber boot and held on by a nut. This is easier done on the 70A version. On the 55A version both plugs are behind the backing plate which must be first removed by undoing three 8mm nuts. There is just enough space and wire length to rotate the alternator into position to accomplish this. 13mm socket. |

|
| 16) Remove the alternator. You are now free to remove the alternator. There maybe just enough space with the exhaust in the way to remove it. If you cannot get it out, undo the bumper bolts to remove the bumper to add more clearance. 17mm socket. |

|
| Done. Seems like a lot of work even though only about an hour went by, doesn't it? Only half way done! |

|
| 17) Remove pulley. Rebuilt alternators never come with a pulley so you have to swap yours over. Bosch didn't provide much surface to undo the pulley until they switch to the later style rotor shaft with the 8mm hex keyhole in the end. The nut is only held on by 29 ft. lbs but often it has been zapped on by a rebuilder/mechanic with an impact wrench making it must harder to remove. The M16 nut and split lock washer probably requires 49 ft. lbs. There is no spec for these fasteners but I looked up the spec in a Corrado Bentley that uses the same M16 size hardware. Be VERY careful not to strip the flats on the pulley as you apply leverage to the pulley. 22mm socket (24mm on later style with hex key). Do NOT jam a screwdriver to keep the pulley from rotating: you may damage the stator windings. |

|
| Don't forget to swap the plastic sealing ring onto the new/rebuilt before you tighten the pulley! |

|
You'd think alternator replacement would be simply but remember that it's an electrical device and as such is easily affected by poor terminal connections.
Now you can connect the battery ground strap and start the engine. The charging light on the dash should go out immediately.
Taking the alternator apart is not for the faint of heart. Replacing the bearings, brushes and testing the rotor/stator/diodes/supressor are within the ability of the average VW owner but I would leave replacement of the slip rings to a rebuilding shop unless you've got a heavy duty soldering iron and you've seen the operation performed a couple of times.
Why do it yourself? The challenge of it or perhaps you'd like to use non-Chinese bearings. I'm not not sure what discount a local rebuilder will give you if you supply your own bearings but it's worth asking.
Unfortunately the 70A version uses different bearings than the 55A version. The drive end bearing is (front, 021-903-221B) identified by the standard bearing part number 6303Z. It's 47x17x14mm (od id wide) and it is metal shielded on the front side and open on the back because a cover plate is used to secure the bearing in the drive end shield. I've cross referenced this number to SKF 6303-2Z and Timken 303-SS. This bearing is easy to find, even at the flaps but you'll pay double compared to a bearing supply house.
The slip ring end bearing (rear, 021-903-221C) is 62012. It has a rubber seal on the slip ring side and a metal shield on the backside. It's 28x12x12mm (od id wide) and I've cross referenced this number to SKF 394737A, FAG 63001.2RSR and SKF 63001-2RS1. This bearing is hard to find.
The difference between a metal shield and rubber sealing has to do with maximum rpm. Given the 10.8k rpm max alternator speed when used in the Type 4 engine with 5400rpm rev limiter, double rubber seals will suffice but it's imperative that the bearings be sealed because the inside of the alternator gets very dusty, especially between the slip ring and its bearing.
Simply tools are required to disassemble the alternator but a word of caution: you need an arbor/press to R&R the rotor from the drive end shield in order to replace the bearing underneath. If you are not going to remove and replace the slip rings, you must insert the rotor shaft to the same extension depth because the brushes are fixed and have worn a specific section of the slip rings. If you fail to align the slip ring and brushes they will make poor contact and wear abnormally. Normally this isn't an issue for a rebuilder who will turn or replace the slip rings as a matter of course so if you forget to take the appropriate measurements you may have to revisit your local rebuilder to help you reassemble it.
Be sure to bag the parts as you remove them and label them with your remove steps.
09/13/05 - Created
09/07/11 - Fixed broken photos, added translate button, updated footer
07/15/19 - Google update: new adsense code, removed defunt translate button