Brake Job
by Richard Atwell
(c) Copyright 2005-2011
Brake Jobby Richard Atwell |
|

When your brakes aren't working well an overhaul of the brake system is order. Maybe you don't know how good the brakes can be in the first place? Baywindow Bus brakes (especially the 73-79 systems) are heavy duty and can bring the bus to a stop in short order.
Although easy to adjust, there are a lot of components and tools so I've written a lot here to be thorough (badly needed pictures are coming, sorry). This article covers a complete overhaul so if you are just replacing pads you'll have to skip through as you read.
Once you get started and make one change to your brake system you may not be able to stop (figuratively) because all of the parts are interconnected and the problem will often move to another part of the system. Brakes are adjusted rear first, then front and ALWAYS replace parts as pairs.
Instructions below are for the adjustment of 73-79 brakes but also include replacement recommendations so you should read through this procedure at least once before starting to order the parts you might need.
I believe all of this info applies to 71-72 brakes as it does to 73-79 brakes. I've noted the exceptions as best as possible. 68-70 models have drum brakes up front so the rear procedures apply equally to the front.
Parts required (depending on condition):
Chemicals required:
|
Tools required (mechanical):
Tools required (hydraulic):
|


|
||||||||||||
|
If you like helping friends do brake jobs on a regular basis, these tools are really useful. I believe Kukko makes them:
|
If you don't want to pay those prices, you can buy them through ATE like I did (I forget the cost and it was so long ago the prices have probably gone up with the Euro which may mean they are now Kukko expensive):
| Description | Art No. | List Price |
|---|---|---|
| Pad extractor | 0.9314-1400.2 | NLA (see note) |
| Piston Reset Tool | 03.9314-4950.3 | current price? |
| Piston Rotating Pliers | 03.9314-5700.3 | current price? |
Note: only the really expensive slide hammer version is available now so buy this item from Kukko.
Contact Rainer Wittich at The Brinson Company, Inc (brinsonco.com) in order to buy ATE items by part number in the USA. Sometime it costs extra for shipping because an item comes from Germany.
Put the transmission in 4th gear and remove all four hubcaps. Every VW comes with a two prong puller in the toolkit for doing this and you will need a tommy bar for leverage. If you use something else, try not to scratch the rim (or puncture the tire sidewall).
Underneath the bus and behind the cab, back off the square parking brake adjustment nuts all the way on both wheels using a crescent wrench. Not doing this will affect the final adjustment and you will probably have a problem removing the rear drums otherwise. More often than not, the parking brake cables are too loose and require readjustment anyway.
If you only have two stands, you will need to do the front brakes first and the rear brakes last. Jack up the rear by the swing arm support and remove the road wheel to access the drum. Jack up the front by the frame behind the jacking point.
NEVER EVER trying to load or support the bus from directly underneath the jacking point. It will simply crush because the strength is in the frame above it which is what you actual contact with the roadside jack.
Quite often adjusting the brakes affords the new owner their first opportunity to remove the road wheel. The lug nuts are 19mm and tightened to 94 ft.lbs so you need a decent tire iron. If you have the 4-way kind I suggest you use a cheater pipe to help you. A better tool is the so-called gorilla wrench.
I suggest breaking torque on the lug nuts BEFORE you jack up the rear as the parking brake often isn't strong enough to keep the wheel from moving and the transmission only locks the rear wheels. After you've jacked the wheel off the ground you can remove the lung nuts completely.
To remove the drums, first loosen the adjustment screws behind the backing plate with a screwdriver or better yet, a proper brake "spoon". The adjustment screws are behind rubber plugs to keep the water out (do not lose). If there are two sets of plugs (upper and lower), the upper plug is used to inspect the brake shoe lining so leave that one alone. The plugs go hard with age and the backing so if you try to pry them out with a hard edges tool you may damage the softened from rust backing plate.
Turning the stars clockwise will press the shoe against the drum so go the other way. If you point your thumb axially with the stars (parallel to the screw that holds them) from the outside of the wheel then clockwise is the direction your fingers curl (right hand rule). Adjusting stars rust, so new ones might be in order. Move the stars 3-4 teeth and note that you will be turning them in opposite directions (right hand rule).
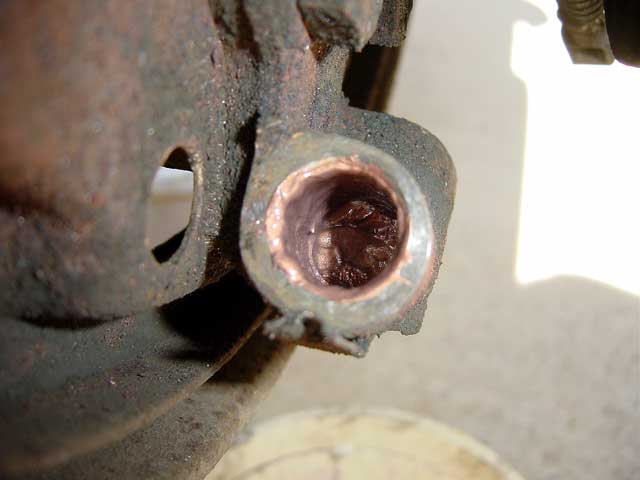
To remove the drum, you do not need a special puller as Bentley depicts because that's used to remove the wheel hub. However, there are two bolts that have to be removed with an 11mm socket. The drum may not want to come off because it may have rusted to the hub in the center. Look at a picture of a drum removed and you can see where it might seize (the inner circle). First use some penetrating oil, let it setup and give the drum a few whacks with a dead blow hammer and it will let you pull it off.
Inspect the drums looking for out of round. You may want to get them turned but adhere to Bentley's spec because there is a minimum thickness that's allowed (max inside diameter 253.50mm). Secondly, what condition are the shoes in? New shoes have about 5-6mm of brake material. Do they need replacing? Are they evenly worn because they tend to wear up at the tops? 2.5mm is the wear limit for shoes but how much material is left above the rivets if you have old style shoes because you can't let the rivets touch the drums.
Shoe replacement is easy. Use some pliers to pry off the parking brake cable (aren't you glad you loosened it earlier!) and remove the spring holding the two shoes together. To remove the shoes you can pull them apart at the brake cylinder and wiggle them free of their obstructions. There is a separating bar that will fall down and some years have two pins holding the brake shoes to the baking plates. They are spring loaded and more difficult to install than remove. Since VW left them out on later model years so you might want to as well.
Hardware behind the brake drum like springs and such need periodic replacement. You might as well do it all while you are in there if they look rusted and original. The hardware kits are universal and mid-74 and later rear drums do not use all of the hardware in the kit so check your setup.
Is either rear wheel cylinder leaking and in need of replacement? Everything is easy to change with the shoes removed even though the hub is still attached. The brake cylinder is held on with a nut behind the backing plate. Use a 13mm socket to remove it.
Do the rubber hoses going from the brake lines to the wheel cylinder have the original x/YY (e.g. x/78) DOT year tag on them (the numbers change to match the production year of your bus)? If so they are original and the rubber is definitely beyond the end of its life and needs to be replaced because they swell with age and won't let to brakes release correctly. You'll need two 11mm flare nut wrenches to replace the hoses.
If your metal brake lines are leaking or heavily rusted you must replace them. Light rusting is normal but if your undercarriage is badly rusted your lines could fail in future. Get a complete set from Cohline and a two-handed brake line bender to shape the brake lines in the set to match the factory layout.
|
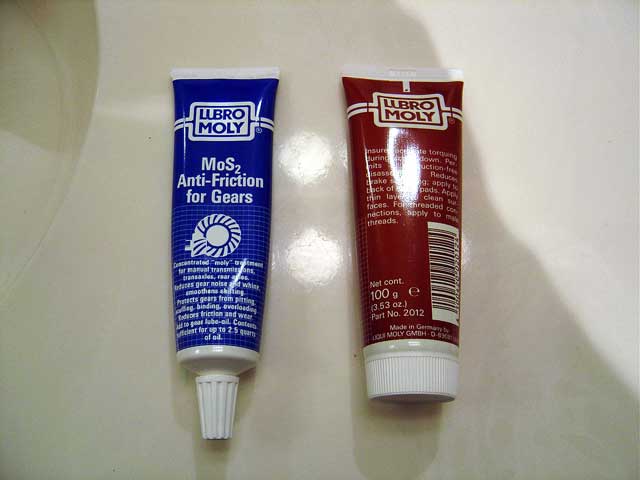
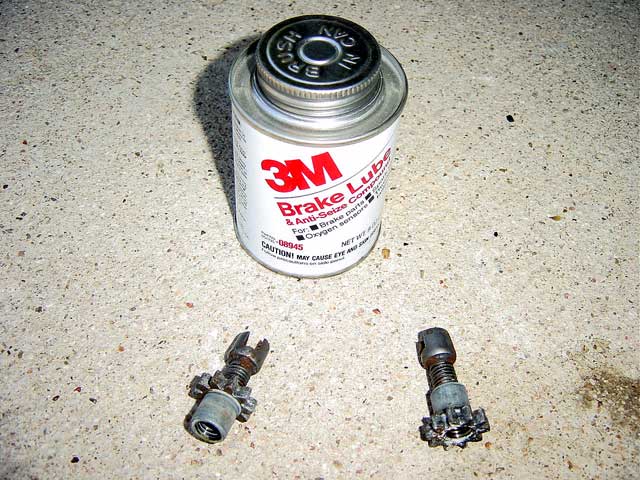
Before reassembly of the rear drum you will want to use anti-seize compound in the barrels and on the threads of the adjustment screws so you won't have difficulty adjusting them in future. They tend to seize without it. If you've rounded the stars and/or they've heavily rusted you should replace them with new screws and stars. Whether you replace the stars or not, treat them and reset their position to prepare for adjustment. |
 
|
|
|
Also place a dab on anti-seize on the backing plate where the shoes rub against the raised nubs. Now is also a good time to check the parking brake cable. Do you need a new one? They typically last a very long time but if installed incorrectly they can rub against the hub. |
||
|
When everything is back together replace the drum and secure it with the two bolts using your 11mm socket and repeat all of the above steps on the other side. A little anti-seize on the hub where it contacts the drum will help prevent seizure in future. A little anti-seize where the rim contacts the drum is useful for the same reason. I like to use the slightest amount of anti-seize on the wheel mounting bolts. First clean the threads with a brass brush then no more than a pea sized amount of anti-seize on the threads. Wipe the excess onto the next bolt as you go. |
|
|
Put the transmission in neutral and adjust the rear brakes using the adjusting stars. Turn them evenly (say 5-10 clicks per side) until the drum refuses to rotate. Now go and stop on the brake pedal five times. You'll often find that the drum now moves because the brake cylinder has moved and the springs have retracted the shoes a little.
Repeat the steps above until the drum locks up even with the brake pedal being pressed then back them off 1-2 teeth so the drum barely scrapes on the shoes. You always want a slight drag so the brakes engage right away. Repeat with the other side and you are done with the rear for now.
I should point out that between the rear hydraulics and the front is a proportioning valve that keeps the rear brakes from locking up because the front disc brakes are so much stronger. It's almost bullet-proof so you usually don't have to worry about it. You'll find it near the master cylinder.
Jack up the front and remove the road wheel. Because the parking brake only affects the rear, you'll have to use the weight of the bus (in gear) again to keep the wheel from moving so you can break torque on the lug nuts.
Make a similar inspection to both of the rubber hoses up front and replace them if necessary. Simply putting on new thicker pads may cause the brakes to rub more if the hydraulic part of the system has aged. What little clearance there was before will be eliminated when new pads are put on and you'll get squealing. This is a sure indication that your brake hoses are shot.
If you are not going to replace the rotors, check that the 19mm caliper retaining bolts are torqued to 116 ft.lbs otherwise you may experience some horrid vibration during severe braking. (Torque is 72 ft.lbs on 71-72 models).

To access the front pads you need to remove the caliper separating spring which is held in with two pins. Use a 4mm pin punch to knock them from outside to inside. If they are rusty you should replace them with new hardware which is cadmium plated to resist rusting and allow the pads to move easily.
Remove the spreader spring and then retract the pads. Sometimes they are stuck and need to be yanked out with a two sets of pliers or two coat hooks. You can also buy a nice German pad puller tool to remove them. Some are simple handles while others that cost more act like slide hammers. To help ease removal, push each pad away from the rotor by its ears to retract the piston a little. Whatever you do, DO NOT step on the brake pedal while the pads are removed.
When you push the pistons in, the fluid level in the reservoir under the seat will rise so make sure you drain the fluid level a little if it's already at the top.
When you remove the two pads you should also be removing two backing plates that separate the pads from the pistons. If the plates are missing you may have discovered why your brakes squeal as the plates keep the pistons from spinning and rubbing against the backing surface of the brake pads.
Use a stiff wire caliper brush to clean the usual spider egg sacks and the build up of brake dust from the caliper pad area. Be careful around the seal and do not breathe the dust (wear a mask).
Are the pads worn down? New pads are 14mm thick (10mm on 71-72 models). Although the wear limit is 2mm, I wouldn't wait until your reach that thickness if you are near to it.
|
How about the rotor? The wear limit is 11.5mm and some rotors are stamped 11mm. If it warped or if it's severely rusted it will shred new pads to pieces. New rotors are not expensive and I find they are comparable in cost to having them re-machined. Rotors are only held on with 2 socket head screws that are removed with a 6mm hex bit but you'll have to unbolt the calipers first. Because of their weight and the metal brake lines you'll have to support them or suspend them with wire in order to remove the rotors. |
 
|
To remove the rotor you must remove the two large caliper mounting bolts on the back. If you are replacing the rubber hoses you can remove the caliper from the vehicle. Remove the spring that secures the rubber brake hose to the steering knuckle before undoing the bolts. Do not let any dirt into the brake lines.
Always clean new rotors with brake cleaner to remove the preservative that keeps them from rusting on the shelf. They must be spotless and no grease/oils (or brake cleaner) can be present or the pads will become contaminated so please wear gloves.
|
New rotors are coated with a preservative to prevent rusting. Use break cleaner to remove the coating and be sure to handle the rotors with clean rubber gloves at all times so the grease/dirt from your fingers don't contaminate the brake pads later. If you are re-using rotors because they are still within spec and look good, use a fine sand paper to remove the old pad material from the rotor (you can't really see it). This will create a nice surface for the new brake pad material to adhere to. You can roughen the rotor's surface slightly with 120-150 grit sandpaper. What I do is sand each face of the rotor back and forth a few times with the largest chord I can make. Then I rotate the rotor and repeat 8-12x until I've gone all the way around. The end result is a cross hatching pattern you'll see on some factory rotors and this will help the new pads bite into the rotor. Installing the rotor is as simple and removing it. |

|
|
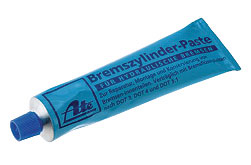
Inspect the dust boots on the inside of the calipers. Are they torn? If so you'll need a seal kit because a torn boot will let crud inside and contaminate the piston seal. This seal keeps the fluid in but also helps to retract the piston in the caliper along with the action of the spreader spring between the pads. I do not recommend you split the caliper to replace the o-rings to completely replace all seals: leave that alone. See Bentley for all the caliper rebuilding instructions. Use brake fluid for lubricating everything during assembly. VW says use brake paste but it's not readily available anymore even from over the counter at the VW dealer. You may also use brake rubber grease from PBR which is castor oil based. |

|
Next, are the two backing plates in good condition? They will probably be corroded and have lost their nice cadmium plating but you can sand them clean. What about the tabs in the backing plates? Do they engage the tabs in the pistons? If they are flat they are not doing their job as they must stick out about 2mm. If the pistons may have rotated, this will cause vibration when braking and you probably won't be able to install both the pads and backing plates without pressing in the tabs again so the piston needs to be reset.
There are special pliers from ATE designed to rotate the piston in place. Be careful rotating the piston because the piston is made from a soft pot metal. It will chip if you try to use a screwdriver tip to rotate it. Check the position of the piston cutouts (20 degrees) and make sure the tab engages both cutouts before putting the pads in.
Before dressing the pads, check that you can install the pads and backing plates. If you can't get the thicker pads in, you may need to use a piston retracting (spreader) tool to push the pistons inward. Before moving the pistons back, take the top off the break fluid reservoir and remove some brake fluid if it's 100% full so no fluid backs up when you push the pistons back.
To help prevent squealing, chamfer the leading and trailing edges of the brake pads with a fine tooth file if they have a 90 deg. edge. You only need to remove a little of the corner for this modification to work. Remove too much and you'll remove a percentage of the surface which will reduce braking effectiveness.
Sometimes a paste/liquid comes in the box which is an anti-squeal agent that goes between the back of the pad and the backing plate. Only a little goes on otherwise the pressure will squeeze out the excess and make a mess and/or contaminate the brake pad material. Put a drop in the middle and spread it around with your finger. Keep it thin and keep it at least 1cm from the edge. Also put a thin layer on the piston side but only on the semi-circle that the piston will contact (use the tabs and corrosion marks as a guide).
With the pads and backing plates in place you can reinstall the spreader spring and retaining pins. Place some anti-squeal on the top and bottom ends of the spring on the outside where the pins make contact. This will help the pads to move when the pedal is released. (Disc brakes are self-adjusting). Tap in the retaining pins and put a little bit of anti-seize in the outside caliper holes for the pin to prevent seizing. The inner end of the pin has a plastic retainer so you shouldn't use anti-seize there. Now do the other side.
With it all back together (wheels still removed) check the rubber line from the brake fluid container to the container on the master cylinder (MC) for leakage. Only a special clamp can be used here so don't lose it. Are there boots covering the two brake switches on the master? Are the reservoir containers cracked or leaking at their grommets? Is there a leak at the brake switches?
Adjusting the master is a last resort to cure braking ills as all the other parts tend to wear out or require periodic adjustment first. See Bentley.
|
With all the mechanical work out of the way, you can now replace all fluid and bleed the system. You'll need a 7mm box wrench and, 2ft of 5/16" plastic hose and a catch container. Bleed from longest lines to shortest (passenger rear, driver rear, passenger front, driver front). The rear brakes only have a single bleed screw at the cylinder. On the front brakes bleed from the bottom screw until new brake fluid comes out then bleed from the top screw to remove any trapped air. Sometimes a lot of sediment will come from the bottom bleeder (often it's pieces of old brake hose lining). The best way to bleed IMHO, is to use the Motive Power Bleeder. The next best technique requires the use or special bleeding screws called Speed Bleeders. If you lack either of these you will need TWO people to bleed the brakes. The procedure is repetitive and error prone so it's best to invest in the bleeding tools because you'll be bleeding brakes over and over if you plan to own your bus a long time. |

|
|
Brake fluid is clear to light yellow in color. Your old fluid will probably be golden or even dark brown. Brake fluid changes color as it absorbs water to protect parts from rusting internally. Use Castrol LMA brake fluid. If you've opened the brake lines to replace hoses or cylinders you'll need to use a lot of fluid. Buy 1 32 oz bottle and the smaller 12-16 oz bottle. If you haven't replaced any hoses, you'll just need the little bottle. Brake fluid in containers must be kept sealed to prevent it from going bad. Some people throw away (recycle properly) what they can't use but I find it's overkill. |

|
|
One trick for bleeding is to use a blue dyed brake fluid like ATE Super Blue every second time you bleed. As you bleed the color will change from golden to green to blue and then you know you've flushed out all the old fluid. Next time use, regular colored fluid (ATE Typ 200) and watch it turn from blue to green to clear/yellow. By watching the color change you will find that you waste less fluid during bleeding. |

|
|
Attach your pressure bleeding and pressurize to 20psi or fill up the reservoir. Stomp on the brake pedal 5 times to push the pistons in the calipers. If you stomp first and your reservoir is low you may introduce air into the master cylinder then you'll have to bench bleed it. Attach your bleeding hose and open/close the bleeding screws at each wheel until new fluid comes out. Only do one wheel at a time. With the pressure bleeding you will have increase the pressure of the power bleeder after each wheel. |

|
|
If you are bleeding with two people, the procedure is like so: a friend pushes on the pedal and the other controls the bleed screw who's in charge. He says "push", opens the screw a little and closes it before the pedal hits the floor. The friend, pumps up the pedal and the process repeats until new fluid appears. You can also bleed the brakes without replacing the fluid in order to remove the air bubble in the brake lines. Re-mount the front wheels and sparingly apply anti-seize to the mounting bolts just as you did with the rear. The goal is to keep the threads that are prone to rusting from doing so and that's all. Too much anti-seize will upset the torque value. |

|
The last step after bleeding is to adjust the parking brake. It helps to have a second person engage the e-brake lever while you try to rotate the rear tires with your foot. To do this you'll have to jack the rear wheels off the ground again. Go for 8 clicks of the parking brake when fully applied because any less and the rear shoes may wear out prematurely and you'll be forced to pull the lever more soon after this adjustment.
That's it.
If you put on new pads you must "bed the brakes" to get them to bite. There's a procedure for it somewhere that says what speeds to reach before braking but there seems to be debate on whether to do it gently or heavily. Some vendors publish guidelines and others do not. My advice is to go with a series of successively hard stops. Stomp hard on the brakes from 20 mph, then 40 mph, then 60 mph twice. Be sure the brake caliper bolts are torqued up properly before you attempt hard braking. If you feel heavy vibration the bolts are loose.
Instructions regarding break-in varies because the pad material varies from manufacturer. Some rotor manufacturers, like Brembo even give instructions on break in. Regardless of that, what's important to understand is that for the rotor and pads to work effectively as a pair some of the brake material must transfer from the new pads to the rotor. If you are too hard on your brakes during the first 150 miles, you may glaze the pads and this will reduce breaking force. Once you've bed the brakes within the first few hard stops be gentle with them during the rest of the break-in period.
The number one reason that brakes squeal after pads are changed is because the brake hoses are too old. Over time the rubber hoses collapse on the inside and prevent the brake fluid from returning to the master cylinder. This causes the pistons in the calipers to remain engaged and the result is an irritating squealing sound while you are driving.
The number two reason is due to the pads themselves either because the edges weren't chamfered or because the pads weren't bed in properly or at all. See the instructions for bed them in above in the adjusting section above.
Another possible cause although less likely is a worn out or rusty spreader spring. The spring and the pins that holds it in place should not be rusted so the spring can move correctly.
The ATE made caliper has a spreader spring that looks like a cross ( 4-tabs). The Girling caliper has 6 tabs. You might also look for the letters ATE printed on the rubber cap that covers the bleeding screw although this isn't a definitive test (the bleeder screws are different between ATE and Girling calipers as well).
Calipers suffer from a couple of problems:
The front brakes are self adjusting. This means the pads are in bare/brush contact with the disc at all times. The piston is retracted by the brake fluid suction and the tension of the inner seal and the spreader spring. When brake dust and crud contaminates that area the brakes can squeal and pulse. It's easy to picture a piston that isn't aligned to the rotor causing problems.
06/05/07 - Moved from FAQ
06/06/07 - Added some photos
09/08/11 - Fixed broken photos, added translate button, updated footer
07/15/19 - Google update: new adsense code, removed defunt translate button